EN
EN

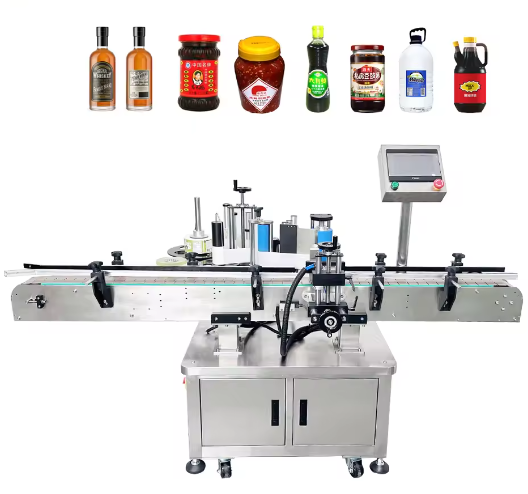
The Real Cost of Running Multiple Container Formats
Production lines rarely run one bottle size forever. Seasonal promotions, private-label contracts, and shifting consumer preferences all demand flexibility. Yet many operations treat changeovers as unavoidable downtime—something to endure rather than optimize. A mid-sized contract packager in the Midwest once tracked their changeover logs over six months and found they were losing nearly 11 hours of productive run time per month just adjusting their roll-on labeling machine between three bottle diameters. That translated to roughly 19,000 unlabeled units sitting in queue, waiting for the line to come back online.
The good news? Modern automatic roll-on labeling machines are built to handle these transitions far more efficiently than the old mechanical setups that required wrenches, shims, and a lot of trial and error. The adjustment process follows a logical sequence—and once that sequence becomes muscle memory, changeovers drop from a dreaded chore to a routine five-minute task.
Starting with the Conveyor and Infeed Guides
Before touching anything related to the label application itself, the container path needs attention. The conveyor guides determine how consistently bottles enter the labeling station. For smaller diameter bottles—say, a 50mm pharmaceutical vial versus a 90mm food jar—the guide rails need to close in. Most systems use hand-adjustable rails with graduated scales or quick-release levers.
Here is the common mistake: operators often adjust only one side. That shifts the bottle centerline, which throws off label placement. The correct approach is to move both guide rails symmetrically. A practical check—run a few sample bottles through without labels enabled. Watch how they track. If they wobble or drift, the guides are either too loose or misaligned. The ideal gap leaves about 2-3mm of clearance on each side of the bottle, enough to prevent binding but tight enough to maintain consistent positioning.
Dialing in the Bottle Diameter on the Roller Assembly
The roll-on mechanism itself relies on precise contact between the bottle surface and the labeling pad. This is where diameter adjustments matter most. The machine needs to know the bottle circumference so the label feed synchronizes correctly—otherwise, the label either overlaps itself or leaves a gap.
On most automatic roll-on labelers, the adjustment happens through two primary controls: the roller spacing and the pressure setting. The rollers that support and rotate the bottle must be set so the bottle sits firmly but not squeezed. A useful field test: place a bottle between the rollers and spin it by hand. There should be slight resistance but no binding. If the bottle stops spinning immediately when released, the rollers are too tight.
For the pressure setting—the force that presses the label onto the bottle—thicker-walled containers like glass can handle more pressure, while thin-walled PET bottles require a lighter touch to avoid deformation. A good starting point: set pressure so the label adheres fully around the circumference without creating visible indentations on the container surface.
Adjusting Label Feed and Registration
Once the bottle is physically positioned, the label path needs calibration. The label unwinder, peeler plate, and applicator head all work in concert. Changing bottle diameter changes the linear distance the label must travel per revolution—which means the feed timing shifts.
Here is where servo-driven systems shine. Instead of mechanical cam adjustments, modern machines store preset parameters for each bottle size. An operator calls up the saved recipe, and the servo motors automatically adjust feed length and application timing. But even with servos, a registration check is essential. Run a few test labels onto bottles and measure where the seam falls. The industry benchmark for acceptable seam position variation is ±0.5mm. If the seam drifts, the label sensor threshold or the unwind tension may need fine-tuning.
A quick tension check: peel a label off the liner and hold it by the edge. If it curls excessively, the unwind tension is too high. If it feels loose and floppy, tension is too low. Either condition causes misregistration during high-speed running.
Height and Label Placement Position
Bottle height changes affect where the label lands vertically. A short vial needs the label centered differently than a tall sports drink bottle. The applicator head on most roll-on machines adjusts vertically via a handwheel or motorized lift.
The adjustment logic is straightforward: measure from the bottle base to the desired label bottom edge, then set the applicator head so the label leading edge aligns at that point. But there is a nuance—label placement relative to the bottle seam or embossed features. For bottles with molded-in logos or grip textures, the positioning system may need to reference a specific rotational orientation. Some machines use optical sensors to detect a notch or seam and rotate the bottle accordingly before labeling.
A practical approach for initial setup: mark a reference line on a sample bottle with a permanent marker. Run it through and see where the label lands relative to that mark. Adjust the vertical position in small increments—1mm at a time—until the label sits exactly where intended.
Saving Recipes and Validating the Changeover
The final step separates professionals from amateurs: saving the setup parameters. Every adjustment made during the changeover—conveyor guide position, roller spacing, pressure, label feed length, vertical head position—should be stored as a named recipe in the machine’s HMI. Next time that bottle size runs, the operator recalls the recipe and does a quick verification run rather than starting from scratch.
Validation matters too. After any changeover, run at least 20 to 30 bottles at production speed and inspect every label for wrinkles, bubbles, seam alignment, and vertical position. Document the results. This creates a feedback loop—if a particular recipe consistently produces slight misalignment, the stored parameters can be tweaked and re-saved.
One packaging engineer at a Southern California beverage plant shared that their team reduced average changeover time from 22 minutes to under 6 minutes simply by implementing a strict recipe-saving discipline and training operators on the symmetrical guide adjustment method. The savings added up to over 200 extra production hours annually.
Automatic roll-on labeling machines are remarkably adaptable when operators understand the adjustment logic. The hardware provides the capability; the procedure delivers the results. Manufacturers like BestPropak engineer their systems with tool-free adjustments and recipe storage precisely to minimize the friction of running mixed container sizes—allowing production lines to stay flexible without sacrificing uptime.